ComfyUI for Beginners: Install It, Then Create and Edit AI Images With FLUX 3 Klein
LongCat Avatar 1.6 turns one photo and one audio file into a lip-synced talking video on your own GPU; our 3-step preset runs 2.9x faster than 8 steps.
Published Oct 17, 2026 · 10,716 views · Watch on YouTube
Get the app and files

LongCat Avatar Tutorial: Turn Your Photo and Voice Into a Talking Video
LongCat Avatar 1.6 turns one photo and one audio file into a lip-synced talking video on your own GPU; our 3-step preset runs 2.9x faster than 8 steps.
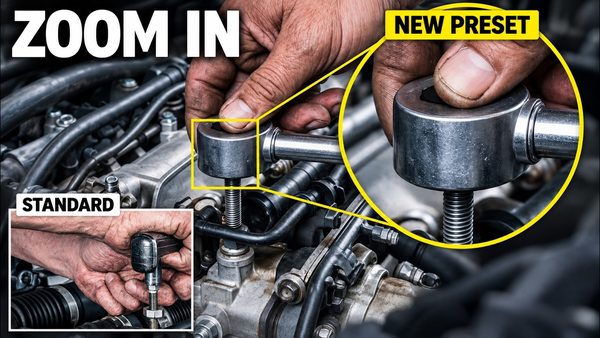
MiniMax H3 Image: New Preset Fixes Tiny-Detail Errors at 16 MP
MiniMax H3 Image gets a new text-to-image preset that draws small objects such as watch gears, gem settings and tools more correctly at 16 MP in 6 steps.
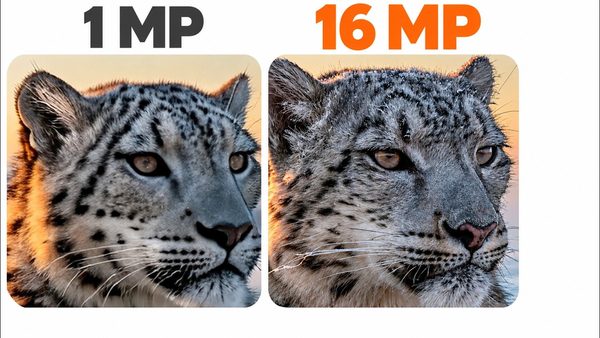
MiniMax H3 Image in ComfyUI: 16 MP Images and Edits in 6 Steps
MiniMax H3 Image is a new 33.1B model that generates and edits 16 MP pictures in 6 steps on your own GPU; our ComfyUI V150 ships two ready presets for it.

ComfyUI Install & FLUX 3 Klein: The Complete Beginner Tutorial
ComfyUI beginner tutorial: install on Windows and learn FLUX 3 Klein with 16 core examples, precise image edits, RTX 5090 tests and launcher tuning.
Chapters
- 0:00 Precise edits and 16 FLUX 3 examples
- 2:47 Open a preset and generate your first image
- 4:00 Package and Windows requirements
- 4:54 Download and extract the installer
- 6:26 Install ComfyUI and Python
- 7:11 Finish Torch and CUDA setup
- 7:56 Install custom nodes with bundle 100
- 9:08 Download the model downloader
- 10:02 Start and explore the downloader
- 11:19 Set model folders and ComfyUI structure
- 11:45 Select the FLUX 3 core bundle
- 12:36 Download and verify three models
- 13:06 Check model filenames and folders
- 13:56 Use the URL Downloader
- 14:27 Start ComfyUI and explore nodes
- 15:20 Open the advanced image preset
- 16:03 Describe the aurora and inspect loaders
- 16:41 Set shape, megapixels and dimensions
- 17:17 Seed, sampler, steps and guidance
- 17:46 Generate and inspect the aurora
- 19:05 Create a crystal kingfisher
- 19:58 Generate exact poster lettering
- 21:06 HQ INT8 ConvRot conversion
- 21:21 RTX 3090 speed and mixed precision
- 22:34 RTX 5090: BF16 versus HQ INT8
- 23:44 RTX 5090 live generation
- 25:08 Give the prompt guide to your LLM
- 26:18 Use Gemini for captions
- 27:15 Expand scene, poster and edit ideas
- 28:30 Generate from the enhanced caption
- 29:38 Open image editing and load a reference
- 30:22 Describe changes and preserved details
- 31:29 Inspect the before-and-after slider
- 32:16 Remove, move and replace desk objects
- 34:03 Reinterpret a painting as photography
- 35:15 Keep cat identity in a new setting
- 36:32 Combine identity and style references
- 38:22 Transform a landscape into winter
- 39:23 Compare geography and seasonal light
- 39:54 Replace packaging lettering
- 40:54 Inspect the enlarged tea label
- 41:25 Assign reference roles
- 42:37 Generate the combined campaign image
- 43:30 Layout boxes and Modern Node Design
- 44:35 Draw four placement regions
- 45:32 Match object mentions to box labels
- 46:16 Inspect all four climates and labels
- 47:12 Load ten references in order
- 48:37 Set reference resolution and caption
- 49:23 Check all ten cabinet objects
- 50:20 Create three product views
- 51:27 Images per prompt and batch results
- 52:46 Prepare a folder of text prompts
- 53:52 Queue and inspect both outputs
- 54:36 Compare prompt weighting
- 55:37 Seeded choices, schedules and BREAK
- 56:47 Negative prompts and CFG 1
- 57:18 Repeat a fixed seed
- 58:21 Randomize the composition
- 58:55 Variation seed and strength
- 60:08 Configure a compatible LoRA
- 61:07 Reuse models with extra paths YAML
- 61:50 Move the decoder and save its mapping
- 63:13 Restart and verify shared models
- 63:41 Edit Default BAT launcher arguments
- 64:27 Add --reserve-vram 2
- 65:34 Restart and verify the changed launcher
- 66:15 Cache and low-VRAM options
- 67:13 Remove or restore an argument
- 68:31 Optimized launcher and memory menu
- 69:31 Choose caching and verify launch mode
- 70:51 Update while preserving your work
- 71:33 Update ComfyUI and the node bundle
- 72:52 Test the updated setup
- 74:21 Continue with your reusable installation
About this video
Install ComfyUI on Windows and make precise FLUX 3 Klein images: 16 core examples, RTX 5090 tests and launcher tuning. The package includes RunPod, SimplePod, Massed Compute and Linux routes.
Links:
ComfyUI package: [ https://www.patreon.com/SECourses/posts/comfyui-auto-2-105023709 ]
Model downloader: [ https://www.patreon.com/posts/114517862 ]
Windows requirements tutorial: [ https://youtu.be/ptuLL0C72Ms ]
Requirements installer: [ https://www.patreon.com/SECourses/posts/1-click-windows-172290854 ]
Cloud setup tutorials: [ https://youtu.be/9C_6qNKjgpA ]
You will learn installation, models, captions, image edits, layouts, batches, shared storage, launch arguments and updates. Follow the complete route from the download post to a working image. Open saved workflows, place references, inspect enlarged results and compare changes using sliders and labeled boards. The examples show exact lettering, object preservation and ten-reference composition.
Main topics include HQ INT8 ConvRot, Gemini, seeds, LoRAs and VRAM. Benchmarks: up to 2.3x on RTX 3090 and 1.82–2.18x on RTX 5090, for warm transformer steps only; loading, text encoding and image decoding excluded. Learn what --reserve-vram changes, why a saved BAT needs a server restart, and how to verify a small workflow afterward. Change one option at a time and compare the same task.
Use the chapters to jump to each setup step, feature and comparison.
Chapters:
0:00 Precise edits and 16 FLUX 3 examples
2:47 Open a preset and generate your first image
4:00 Package and Windows requirements
4:54 Download and extract the installer
6:26 Install ComfyUI and Python
7:11 Finish Torch and CUDA setup
7:56 Install custom nodes with bundle 100
9:08 Download the model downloader
10:02 Start and explore the downloader
11:19 Set model folders and ComfyUI structure
11:45 Select the FLUX 3 core bundle
12:36 Download and verify three models
13:06 Check model filenames and folders
13:56 Use the URL Downloader
14:27 Start ComfyUI and explore nodes
15:20 Open the advanced image preset
16:03 Describe the aurora and inspect loaders
16:41 Set shape, megapixels and dimensions
17:17 Seed, sampler, steps and guidance
17:46 Generate and inspect the aurora
19:05 Create a crystal kingfisher
19:58 Generate exact poster lettering
21:06 HQ INT8 ConvRot conversion
21:21 RTX 3090 speed and mixed precision
22:34 RTX 5090: BF16 versus HQ INT8
23:44 RTX 5090 live generation
25:08 Give the prompt guide to your LLM
26:18 Use Gemini for captions
27:15 Expand scene, poster and edit ideas