Stop Installing CUDA and Python by Hand: One Click Gets Your PC Ready for Any AI App
LongCat Avatar 1.6 turns one photo and one audio file into a lip-synced talking video on your own GPU; our 3-step preset runs 2.9x faster than 8 steps.
Published Oct 14, 2026 · 1,621 views · Watch on YouTube
Get the app and files
LongCat Avatar Tutorial: Turn Your Photo and Voice Into a Talking Video
LongCat Avatar 1.6 turns one photo and one audio file into a lip-synced talking video on your own GPU; our 3-step preset runs 2.9x faster than 8 steps.
MiniMax H3 Image: New Preset Fixes Tiny-Detail Errors at 16 MP
MiniMax H3 Image gets a new text-to-image preset that draws small objects such as watch gears, gem settings and tools more correctly at 16 MP in 6 steps.
SwarmUI Full Tutorial: 1-Click Install, 4 MP Images, HD Video & Lip Sync
SwarmUI full tutorial from a fresh Windows install: our installers, model downloader with 517+ models and 86 presets turn your PC into a complete AI studio.
Henge 1-Click Video Studio: Character Swap, Motion Transfer, Head Swap
Henge uses MiniMax H3 to swap characters, transfer motion, swap heads and sharpen videos; a 12 second Character Swap took about 4 minutes on an RTX 5090.
Musubi Tuner App: 1-Click LoRA & Fine-Tune Training With 435 Presets
SECourses Musubi Tuner trains LoRAs and full fine-tunes of Qwen Image, Wan 2.2, FLUX 2, Z Image and LTX 2.3 on Windows or cloud GPUs with 435 ready presets.
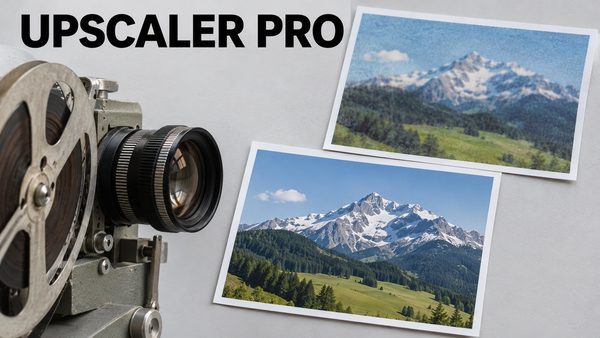
SECourses Upscaler Pro: SeedVR2 & FlashVSR+ Video and Image Upscaler
SECourses Upscaler Pro turns low-resolution videos and images into sharp 1080p, 2K and 4K results with nine AI engines in one standalone app.
Chapters
- 0:00 One click sets up your PC for AI: all tests passed
- 0:17 Windows 10, 11 and Ubuntu 22, 24, 26: ready for any AI app
- 1:03 Download the latest zip and extract it in Downloads
- 1:19 Right-click the .bat and choose Run as administrator
- 1:38 The 20 steps begin: long paths, Store Python removed
- 1:50 CUDA 12.9 + 13.2 toolkits, then cuDNN for PyTorch
- 2:14 Visual Studio 2022 Build Tools and the VC++ runtime
- 2:43 Python 3.10 to 3.14, with 3.12 as the default
- 3:12 Git, Node.js 24, .NET SDK and FFmpeg
- 3:48 PATH order, Git long paths and the page file
- 4:09 Triton cache, NVIDIA driver and the final tests
- 4:32 The HTML report: 78 tests, every step, PATH and backups
- 5:13 Transparent source files, logs.txt, then restart Windows
- 6:05 Ubuntu 22.04, 24.04, 26.04: one sudo command
- 7:00 Rerun any time to update; GCC, Clang, CMake, Ninja
- 7:46 Ubuntu report: OK messages, warnings and logs.txt
- 8:54 One-time setup, ready for our apps and other AI apps
- 9:30 Latest installer version, the guide post and support
About this video
The 1-Click Windows and Ubuntu AI Requirements Installers set up your PC for AI apps such as ComfyUI, SwarmUI, music, text-to-speech and text-to-3D tools: one click on Windows, one command on Ubuntu. They install the latest NVIDIA driver, CUDA 12.9 + 13.2, cuDNN 9.20, Python 3.10-3.14, the C++ build tools, Git, Node.js, .NET SDK and FFmpeg, set PATH in the right order, test everything for real (78 Windows and 66 Ubuntu tests passed on our test PCs) and show every result in a detailed HTML report.
Links:
Download the installers (latest zip) and the full guide: [ https://www.patreon.com/SECourses/posts/1-click-windows-172290854 ]
Previous manual method (older Windows requirements tutorial): [ https://youtu.be/DrhUHnYfwC0 ]
SECourses Discord for help (send your logs.txt): [ https://discord.com/invite/software-engineering-courses-secourses-772774097734074388 ]
You will learn how to extract the zip in your Downloads folder, run the Windows installer as administrator, follow its 20 steps, read the HTML report and logs.txt, run the Ubuntu installer with one sudo command, and rerun either installer to repair or update your setup.
Main topics include 1-click AI PC setup, CUDA and cuDNN, Python 3.10-3.14, Visual Studio C++ Build Tools, PATH order, torch.compile and Triton readiness, FFmpeg for torchcodec, Ubuntu 22.04/24.04/26.04 and real install tests.
Use the chapters to jump to the download, the Windows steps, the HTML report, the Ubuntu installer and updates.
Chapters:
0:00 One click sets up your PC for AI: all tests passed
0:17 Windows 10, 11 and Ubuntu 22, 24, 26: ready for any AI app
1:03 Download the latest zip and extract it in Downloads
1:19 Right-click the .bat and choose Run as administrator
1:38 The 20 steps begin: long paths, Store Python removed
1:50 CUDA 12.9 + 13.2 toolkits, then cuDNN for PyTorch
2:14 Visual Studio 2022 Build Tools and the VC++ runtime
2:43 Python 3.10 to 3.14, with 3.12 as the default
3:12 Git, Node.js 24, .NET SDK and FFmpeg
3:48 PATH order, Git long paths and the page file
4:09 Triton cache, NVIDIA driver and the final tests
4:32 The HTML report: 78 tests, every step, PATH and backups
5:13 Transparent source files, logs.txt, then restart Windows
6:05 Ubuntu 22.04, 24.04, 26.04: one sudo command
7:00 Rerun any time to update; GCC, Clang, CMake, Ninja
7:46 Ubuntu report: OK messages, warnings and logs.txt
8:54 One-time setup, ready for our apps and other AI apps
9:30 Latest installer version, the guide post and support
What it installs on Windows: the latest compatible NVIDIA WHQL driver for GeForce RTX 20-series and newer (checked on every run, never downgraded); Python 3.10 to 3.14 for all users, 3.12 as default; CUDA 12.9 and 13.2 side by side (13.2 default) and cuDNN 9.20, the only cuDNN registered, so PyTorch never mixes two versions; Visual Studio 2022 Build Tools (MSVC, Windows SDK) that keep compiling after Visual Studio updates, the latest Visual C++ runtime and CUDA integration; Git, Node.js 24, .NET 10 SDK for SwarmUI, FFmpeg 9 shared and static; PATH in the right order with your own entries kept, long paths, a 100 GB page file. Ready for torch.compile, Triton and flash-attention, sage-attention, xformers and insightface builds.
On Ubuntu the C++ tools are GCC, Clang, CMake and Ninja, plus Git LFS, uv, free-threaded Python 3.13t and 3.14t and a swap file. With an NVIDIA GPU it installs the newest driver Ubuntu offers and never downgrades it. Ubuntu's own python3 stays as it is.
Windows: put the zip in Downloads (not directly on C:), extract it, right-click Windows_AI_Requirements_Installer.bat and choose Run as administrator. Nothing has to be installed first. Ubuntu: open a terminal in the folder and run sudo bash ./Ubuntu_AI_Requirements_Installer.sh (24.04 recommended).
Afterwards the HTML report opens and logs.txt is saved next to the installer. Restart your PC and open a new terminal for the new PATH. You need this setup only once, not for every app. When the post shows a newer version, run the new one: finished parts are only checked, failed parts are repaired and components are updated, with backups first (--restore-env puts them back).
Tested for real: the tests compile and start C++ and CUDA programs, build Python and PyTorch-style CUDA extensions, compile GPU code for RTX 50 cards, encode a video and build a .NET app, in the environment a new terminal gets; the optional PyTorch GPU test runs with --torch-test. Supported: Windows 10 (21H2+) and 11; Ubuntu 22.04, 24.04 and 26.04 (desktop, server, cloud GPU, WSL2, Linux Mint, Zorin OS), 64-bit x86. Without an NVIDIA GPU everything still installs and compiling works; CUDA apps need an NVIDIA GPU.
This video is for anyone who wants to run AI apps locally without installing CUDA, Python and C++ tools by hand.
For support, questions or installation issues, check the links above, the pinned comment, Patreon, Discord and the video comments, and send your logs.txt if a step fails. Thank you for watching.