Pro-Level Photo Edits on a 6GB GPU? Qwen Image Edit 2511 vs 2509 in 12 Hard Tests
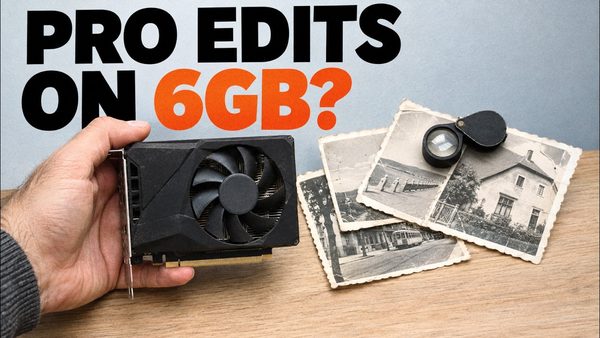
Qwen Image Edit 2511 is a free, open source image editor that challenges Nano Banana Pro, with native 2560x2560 output in 12 steps, even on 6 GB GPUs.
Published Dec 24, 2025 · 12,784 views · Watch on YouTube
Get the app and files
Qwen Image Edit 2511 Tutorial: 12-Case Comparison With 2509
Qwen Image Edit 2511 is a free, open source image editor that challenges Nano Banana Pro, with native 2560x2560 output in 12 steps, even on 6 GB GPUs.
Chapters
- 0:00 Intro to Qwen Image Edit 2511: Replacing a Hat with a Sports Cap Demo
- 0:47 Tutorial Roadmap: SwarmUI, One-Click Installer, FP8 Model, and Hardware Requirements
- 1:43 Case 1 Comparison: Photo Restoration and Colorization (2509 vs 2511)
- 2:36 Resource Info: How to Access the Zip File with All Case Prompts and Images
- 3:05 Case 2 Comparison: Adding a Beard While Maintaining Facial Identity and Realism
- 3:56 Case 3 Comparison: Converting a Real Person into Retro Style Pixel Art
- 4:24 Case 4 Comparison: Combining Three Different Anime Heroes into One Epic Scene
- 5:13 Case 5 Comparison: Removing an Object (Dog) While Preserving Background Details
- 6:00 Case 6 Comparison: Transforming Day Lighting to Realistic Night Time
- 6:38 Case 7 Comparison: Changing Specific Object Color (Rabbit) to Purple
- 7:14 Case 8 Comparison: Changing Clothing Styles While Keeping Body Proportions
- 7:54 Case 9 Comparison: Inpainting a Specific Object (Perfume Bottle) into a Hand
- 8:52 Case 10 Comparison: Zero-Shot Style Transfer (Redrawing a Car Sketch)
- 9:49 Case 11 Comparison: Converting Anime Characters into Realistic Human Renders
- 10:55 Case 12 Comparison: Turning Real Photos into High-Quality Anime Style
- 11:32 Installation Step 1: Updating ComfyUI to Support New Custom Nodes
- 12:45 Installation Step 2: Setting up the SwarmUI Model Downloader Script
- 13:08 Installation Step 3: Downloading the Qwen Image Core Bundle and Verification
- 13:35 Installation Step 4: Updating SwarmUI to the Latest Version via Batch File
- 13:52 Installation Step 5: Importing the "Amazing SwarmUI Preset Version 40"
- 14:47 Configuration: Setting Base Resolution to 1920x1920 for Best Performance
- 15:33 Live Workflow 1: Single Image Editing and "Closest Aspect Ratio" Strategy
- 16:32 Hardware Monitoring: RAM Usage, SageAttention, and 6GB GPU Optimization
- 17:36 Live Workflow 2: Combining Multiple Input Images with 16:9 Aspect Ratio
- 18:35 Performance Analysis: Generation Speed (Steps/Sec) and Power Usage on RTX 5090
- 19:44 Live Workflow 3: Fast Single Image Edit and Reference to Wan 2.2 Tutorial
- 20:41 Tools: Installing and Using the Image and Video Slider Application
- 21:56 High-Res Experiment: Pushing Resolution to 2560x2560 for Maximum Quality
- 22:28 High-Res Monitoring: Analyzing VRAM Usage and Generation Time Increase
- 23:18 Final Verdict: Why 2560x2560 is the Best Resolution for Qwen Image Edit 2511
About this video
Qwen Image Edit 2511 model just published and it is literally competing against Nano Banana Pro at image editing tasks. With native whopping 2560x2560 pixels image output capability and with only 12 steps it is next level. With our installers and specially made Quant FP8 Scaled model, you can run this amazing beast even as low as 6 GB GPUs. In this tutorial, I have compared Qwen Image Edit 2511 with previous successor model Qwen Image 2509 with 12 different unique and hard prompts and cases. Everything is step by step explained and provided.
📂 Resources & Links:
SwarmUI Installer, Model Auto Downloader and Presets: [ https://www.patreon.com/posts/SwarmUI-Install-Download-Models-Presets-114517862 ]
SwarmUI & ComfyUI Setup Guide for Windows: [ https://youtu.be/c3gEoAyL2IE ]
ComfyUI Installer: [ https://www.patreon.com/posts/ComfyUI-Installers-105023709 ]
Image and Video Comparison Slider App: [ https://www.patreon.com/posts/Compare-Images-Videos-Slider-App-133935178 ]
Wan 2.2 Model Training Tutorial: [ https://youtu.be/ocEkhAsPOs4 ]
SwarmUI & ComfyUI Setup Guide for RunPod & Massed Compute: [ https://youtu.be/bBxgtVD3ek4 ]
Upload / Download Big Files Guide for RunPod & Massed Compute: [ https://youtu.be/X5WVZ0NMaTg ]
⏱️ Video Chapters:
0:00 Intro to Qwen Image Edit 2511: Replacing a Hat with a Sports Cap Demo
0:47 Tutorial Roadmap: SwarmUI, One-Click Installer, FP8 Model, and Hardware Requirements
1:43 Case 1 Comparison: Photo Restoration and Colorization (2509 vs 2511)
2:36 Resource Info: How to Access the Zip File with All Case Prompts and Images
3:05 Case 2 Comparison: Adding a Beard While Maintaining Facial Identity and Realism
3:56 Case 3 Comparison: Converting a Real Person into Retro Style Pixel Art
4:24 Case 4 Comparison: Combining Three Different Anime Heroes into One Epic Scene
5:13 Case 5 Comparison: Removing an Object (Dog) While Preserving Background Details
6:00 Case 6 Comparison: Transforming Day Lighting to Realistic Night Time
6:38 Case 7 Comparison: Changing Specific Object Color (Rabbit) to Purple
7:14 Case 8 Comparison: Changing Clothing Styles While Keeping Body Proportions
7:54 Case 9 Comparison: Inpainting a Specific Object (Perfume Bottle) into a Hand
8:52 Case 10 Comparison: Zero-Shot Style Transfer (Redrawing a Car Sketch)
9:49 Case 11 Comparison: Converting Anime Characters into Realistic Human Renders
10:55 Case 12 Comparison: Turning Real Photos into High-Quality Anime Style
11:32 Installation Step 1: Updating ComfyUI to Support New Custom Nodes
12:45 Installation Step 2: Setting up the SwarmUI Model Downloader Script
13:08 Installation Step 3: Downloading the Qwen Image Core Bundle and Verification
13:35 Installation Step 4: Updating SwarmUI to the Latest Version via Batch File
13:52 Installation Step 5: Importing the "Amazing SwarmUI Preset Version 40"
14:47 Configuration: Setting Base Resolution to 1920x1920 for Best Performance
15:33 Live Workflow 1: Single Image Editing and "Closest Aspect Ratio" Strategy
16:32 Hardware Monitoring: RAM Usage, SageAttention, and 6GB GPU Optimization
17:36 Live Workflow 2: Combining Multiple Input Images with 16:9 Aspect Ratio
18:35 Performance Analysis: Generation Speed (Steps/Sec) and Power Usage on RTX 5090
19:44 Live Workflow 3: Fast Single Image Edit and Reference to Wan 2.2 Tutorial
20:41 Tools: Installing and Using the Image and Video Slider Application
21:56 High-Res Experiment: Pushing Resolution to 2560x2560 for Maximum Quality
22:28 High-Res Monitoring: Analyzing VRAM Usage and Generation Time Increase
23:18 Final Verdict: Why 2560x2560 is the Best Resolution for Qwen Image Edit 2511