No Big GPU? Run ComfyUI and SwarmUI on a Rented 96GB Cloud GPU (RunPod RTX Pro 6000)
SwarmUI with a ComfyUI backend gives free, local AI image generation: a 1-click installer, realism and style presets, text-based editing and 4K/8K upscaling.
Published Jun 10, 2025 · 6,229 views · Watch on YouTube
Get the app and files

SwarmUI and ComfyUI Tutorial: Free Local AI Image Generation
SwarmUI with a ComfyUI backend gives free, local AI image generation: a 1-click installer, realism and style presets, text-based editing and 4K/8K upscaling.

Qwen Image Edit Full Tutorial: 26 Demo Cases, Prompts & Images
Qwen Image Edit full tutorial with 26 different demo cases, from photo restoration and text changes to stylization, object removal and outpainting in SwarmUI.
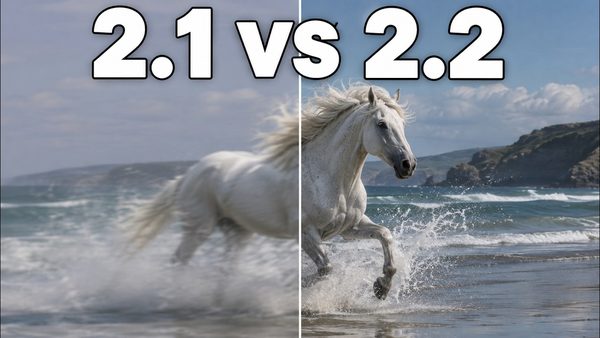
Wan 2.2, FLUX Krea & Qwen Image Upgraded: Fast 8-Step Presets Tutorial
Wan 2.2, Qwen Image, FLUX and FLUX Krea get new SwarmUI presets after a week of research, and new 8-step LoRAs make Wan 2.2 video and Qwen Image fast.

Wan 2.2 & FLUX Krea Full Tutorial: 1-Click Install & SwarmUI Presets
Wan 2.2 and FLUX Krea Dev in SwarmUI with a ComfyUI backend, using ready presets built from hundreds of parameter tests for videos from text or images.

SwarmUI Beginner's Guide: Generate AI Videos With Wan 2.1 and More
SwarmUI beginner's guide to AI video by its developer mcmonkey: pick a model such as Wan 2.1 14B, add it to the right folder and generate your first clips.

ComfyUI & SwarmUI on RunPod Tutorial: 1-Click Setup With RTX 5000 GPUs
ComfyUI and SwarmUI on RunPod, step by step: install both with 1 click, connect ComfyUI as the SwarmUI backend and generate FLUX images and Wan 2.1 videos.
Chapters
- 0:00 Introduction to ComfyUI & SwarmUI Installation on RunPod
- 0:22 Advanced Features of the One-Click Installer (Sage Attention, xFormers, Blackwell)
- 1:03 Demonstration on RTX Pro 6000 GPU & VRAM Optimization
- 1:52 Introducing the High-Speed Unified Model Downloader
- 2:06 Starting the Tutorial: Downloading & Preparing the Installer Files
- 2:45 Registering and Setting Up Your RunPod Account & Billing
- 3:04 Selecting the Optimal RunPod GPU (RTX Pro 6000) and Server
- 3:54 Critical Step: Configuring the RunPod Pod Template (PyTorch 2.2.0)
- 4:20 Setting Volume Disk, Container Disk, and Exposing HTTP Ports
- 5:09 Deploying the Pod and Accessing the Jupyter Lab Interface
- 5:46 Uploading and Extracting the ComfyUI Installer on RunPod
- 6:16 Running the ComfyUI Installation Command in the Terminal
- 7:22 How to Start ComfyUI with Custom Launch Arguments (e.g., --gpu-only)
- 8:13 Overview of Included Libraries (Manager, Flash Attention, DeepSpeed, Triton)
- 9:15 Using Sage Attention vs. xFormers for Optimal Performance
- 9:42 Connecting to the Live ComfyUI Web Interface
- 10:27 Introducing the Unified Model Downloader for ComfyUI & SwarmUI
- 11:01 Running the Model Downloader and Configuring the Download Path
- 11:43 Downloading FLUX Models for a ComfyUI Image Generation Test
- 13:22 Configuring the ComfyUI Workflow with Newly Downloaded FLUX Models
- 15:01 First Image Generation Test: Analyzing the Incredible Speed
- 15:53 Terminating ComfyUI and Preparing for SwarmUI Installation
- 16:25 Installing SwarmUI and Setting it Up via the Cloudflared Link
- 16:50 How to Configure SwarmUI to Use ComfyUI as a Self-Starting Backend
- 17:50 Downloading Wan 2.1 Video Generation Models with the Downloader
- 19:22 Importing Presets and Setting up a Wan 2.1 Video Generation in SwarmUI
- 20:21 First Video Generation Test with Wan 2.1 (GGUF Version)
- 21:26 Analyzing GGUF Performance and Deciding to Test the FP16 Model
- 22:54 Downloading the FP16 Wan 2.1 Model for a Performance Comparison
- 24:01 Installing Extra Features like RIFE Frame Interpolation
- 24:41 Re-configuring SwarmUI to Use the FP16 Model with 16-bit Precision
- 25:52 Analyzing FP16 Performance and VRAM Usage (57GB)
- 26:28 Final Experiment: Using the Official Wan 2.1 Preset for Best Results
- 27:28 Final Results, Conclusion, and How to Get Further Help
About this video
If you want to use ComfyUI or SwarmUI with ComfyUI backend on RunPod cloud platform, this is the ultimate tutorial that you will find to step by step install ComfyUI and SwarmUI on RunPod and use each one of them. RunPod is a great platform to scale your AI generation or if you are a GPU poor, rent the very best GPUs and leverage the AI in your profession. ComfyUI is the ultimate ecosystem right now for Image and Video generation models and with SwarmUI interface leveraging ComfyUI, you can become master for gen AI. So learn how to install ComfyUI on RunPod step by step and run it. Then learn how to install SwarmUI on RunPod step by step and learn how to use it. Then learn how to give installed ComfyUI backend to SwarmUI and leverage its features and ultimate performance and optimizations. Moreover, the installers I made installs Torch 2.7, CUDA 12.8, xFormers, Sage Attention, Flash Attention, Accelerate, Triton, DeepSpeed, ComfyUI manager and moıre.
🔗ComfyUI Installer Zip File Download ⤵️
▶️ https://www.patreon.com/posts/Advanced-ComfyUI-1-Click-Installer-105023709
🔗SwarmUI Installer and Model Downloader Zip File Download ⤵️
▶️ https://www.patreon.com/posts/SwarmUI-Installer-AI-Videos-Downloader-114517862
▶️ Download & Upload Models Tutorial (wget) : https://youtu.be/X5WVZ0NMaTg
▶️ CausVid LoRA V2 Tutorial : https://youtu.be/1rAwZv0hEcU
▶️ CausVid Main Tutorial : https://youtu.be/fTzlQ0tjxj0
▶️ SwarmUI Master Tutorial : https://youtu.be/HKX8_F1Er_w
🔗 SECourses Official Discord 10500+ Members ⤵️
▶️ https://discord.com/servers/software-engineering-courses-secourses-772774097734074388
🔗 Stable Diffusion, FLUX, Generative AI Tutorials and Resources GitHub ⤵️
▶️ https://github.com/FurkanGozukara/Stable-Diffusion
🔗 SECourses Official Reddit - Stay Subscribed To Learn All The News and More ⤵️
▶️ https://www.reddit.com/r/SECourses/
Video Chapters
0:00 Introduction to ComfyUI & SwarmUI Installation on RunPod
0:22 Advanced Features of the One-Click Installer (Sage Attention, xFormers, Blackwell)
1:03 Demonstration on RTX Pro 6000 GPU & VRAM Optimization
1:52 Introducing the High-Speed Unified Model Downloader
2:06 Starting the Tutorial: Downloading & Preparing the Installer Files
2:45 Registering and Setting Up Your RunPod Account & Billing
3:04 Selecting the Optimal RunPod GPU (RTX Pro 6000) and Server
3:54 Critical Step: Configuring the RunPod Pod Template (PyTorch 2.2.0)
4:20 Setting Volume Disk, Container Disk, and Exposing HTTP Ports
5:09 Deploying the Pod and Accessing the Jupyter Lab Interface
5:46 Uploading and Extracting the ComfyUI Installer on RunPod
6:16 Running the ComfyUI Installation Command in the Terminal
7:22 How to Start ComfyUI with Custom Launch Arguments (e.g., --gpu-only)
8:13 Overview of Included Libraries (Manager, Flash Attention, DeepSpeed, Triton)
9:15 Using Sage Attention vs. xFormers for Optimal Performance
9:42 Connecting to the Live ComfyUI Web Interface
10:27 Introducing the Unified Model Downloader for ComfyUI & SwarmUI
11:01 Running the Model Downloader and Configuring the Download Path
11:43 Downloading FLUX Models for a ComfyUI Image Generation Test
13:22 Configuring the ComfyUI Workflow with Newly Downloaded FLUX Models
15:01 First Image Generation Test: Analyzing the Incredible Speed
15:53 Terminating ComfyUI and Preparing for SwarmUI Installation
16:25 Installing SwarmUI and Setting it Up via the Cloudflared Link
16:50 How to Configure SwarmUI to Use ComfyUI as a Self-Starting Backend